准备开始
安装Git 或者安装GitHub Desktop 来对Github进行操作安装Node.js 来搭建博客一个Github 账号用于存放Fuwari文件
一个Netlify 账号创建一个Pages并且绑定域名支持访问
安装MarkText 或者安装Typora 来编辑MarkDown
本地部署Fuwari
使用此模板生成新仓库 或 Fork 此仓库
Clone 仓库到本地,执行 pnpm install 和 pnpm add sharp 以安装依赖
若未安装 pnpm ,执行 npm install -g pnpm
修改Fuwari的基本信息 根目录下的 src 文件夹中,你可以找到 config.ts 来修改你的Fuwari基本信息
站点信息&顶部图
1
2
3
4
5
6
7
8
9
10
11
12
13
14
15
16
17
18
export const siteConfig: SiteConfig = { title: '你的标题', subtitle: '你的副标题', lang: 'zh_CN', // 'en', 'zh_CN', 'zh_TW', 'ja', 'ko' themeColor: { // 主题色部分,按个人喜好配置 hue: 250, fixed: false, }, banner: { enable: true, // 是否开启顶部图 src: 'assets/images/你的图片', // 顶部图存放路径 position: 'center', // defaults或者center credit: { enable: true, // 是否显示顶部图文本描述 text: '想显示的文本', // 输入文本等描述 url: 'https://xxxxxxxxxxxxx' // 顶部图的来源url等 } },
顶部导航栏github部分
1
2
3
4
5
6
7
8
9
10
11
12
export const navBarConfig: NavBarConfig = { links: [ LinkPreset.Home, LinkPreset.Archive, LinkPreset.About, { name: 'GitHub', url: 'https://github.com/saicaca/fuwari', // 想要跳转的url external: true, //是否显示外部链接图标并将在新标签中打开 }, ], }
左侧信息页配置
1
2
3
4
5
6
7
8
9
10
11
12
13
14
15
16
17
18
19
20
21
22
23
24
25
26
27
export const profileConfig: ProfileConfig = { avatar: 'assets/images/avatar.png', // 头像图片文件路径 name: 'AULyPc', // 你的昵称 bio: '这片大地...', // 你的签名 links: [ // 社交栏配置 { name: 'Twitter', icon: 'fa6-brands:twitter', // https://icones.js.org/ icon图标网站 url: 'https://twitter.com/AULyPc1', }, { name: 'Steam', icon: 'fa6-brands:steam', url: 'https://steamcommunity.com/profiles/76561198813644850/', }, { name: 'GitHub', icon: 'fa6-brands:github', url: 'https://github.com/AULyPc', }, { name: 'Email', icon: 'material-symbols:mail', url: 'mailto:cecilybenson8@gmail.com', }, ], }
编写文章 执行 pnpm new-post <filename> 创建新文章页面后src/content/posts/ 目录中编辑你的第一篇文章了
文章需包含以下内容
1
2
3
4
5
6
7
8
9
10
--- title: My First Blog Post <!-- 你的文章标题 --> published: 2023-09-09 <!-- 文章发布时间 --> description: This is the first post of my new Astro blog. <!-- 简单描述你的文章,可有可无 --> image: /images/cover.jpg <!-- 文章主页的封面,可有可无 --> tags: [Foo, Bar] <!-- 文章标签 --> category: Front-end <!-- 文章分类 --> draft: false <!-- 文文章是否为草稿,默认false;设置为true后部署后不可见,但本地开发预览时仍可见 --> language: '' <!-- 可有可无,按需设置 --> ---
本地预览,然后发布到Github
配置好博客信息并编写好文章之后,在项目根目录执行:pnpm dev,稍等片刻,就可以本地预览你的博客了
预览之后使用Git将我们所做的更改发布到Github
将博客部署到Netlify
进入Netlify 官网,使用Github账号登陆或者用邮箱进行注册
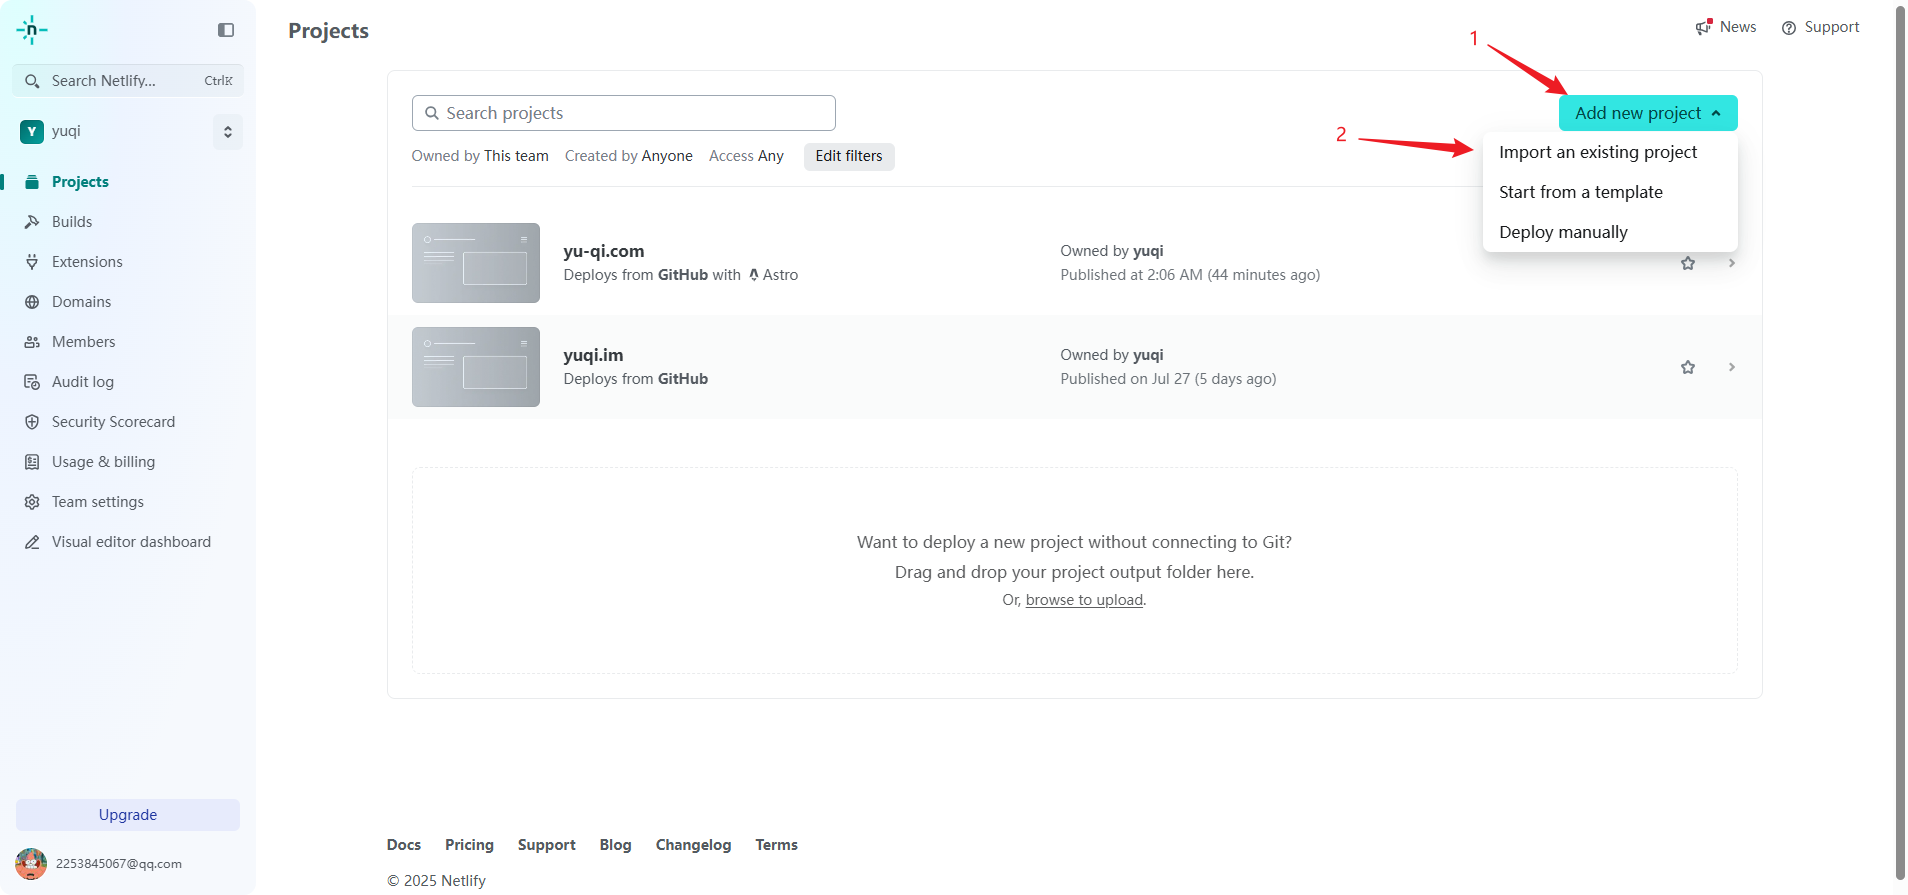
点击添加新项目->导入现有项目
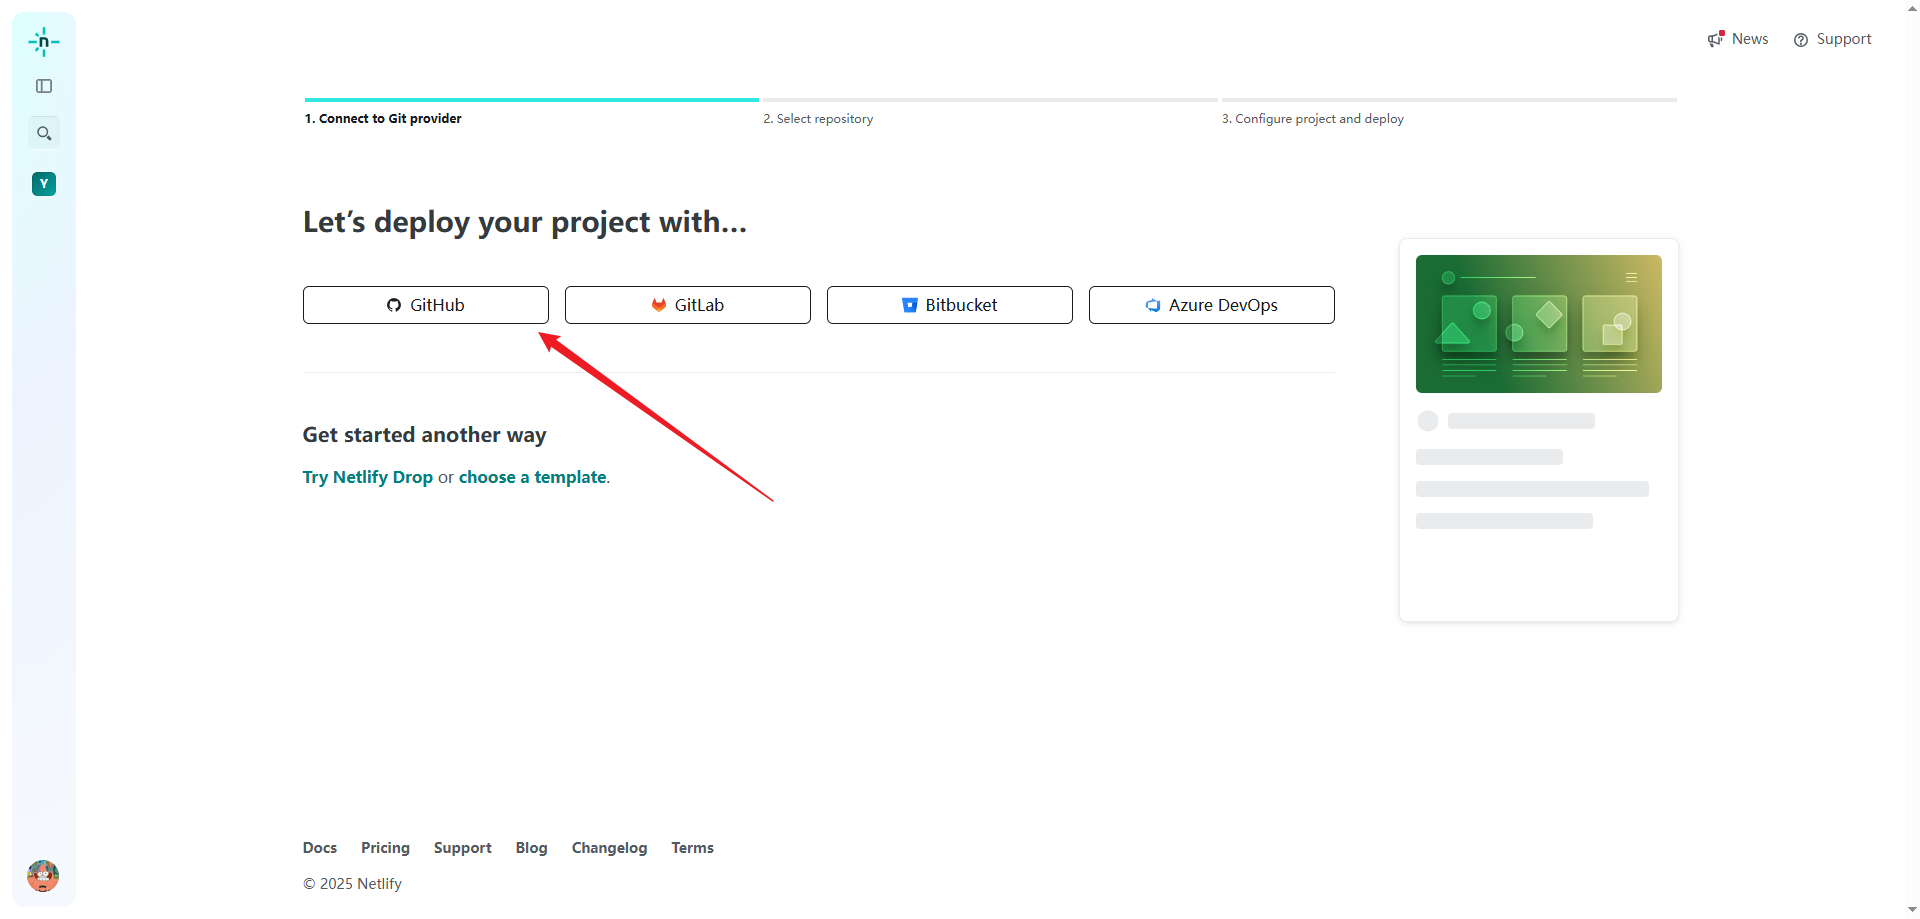
连接到Github
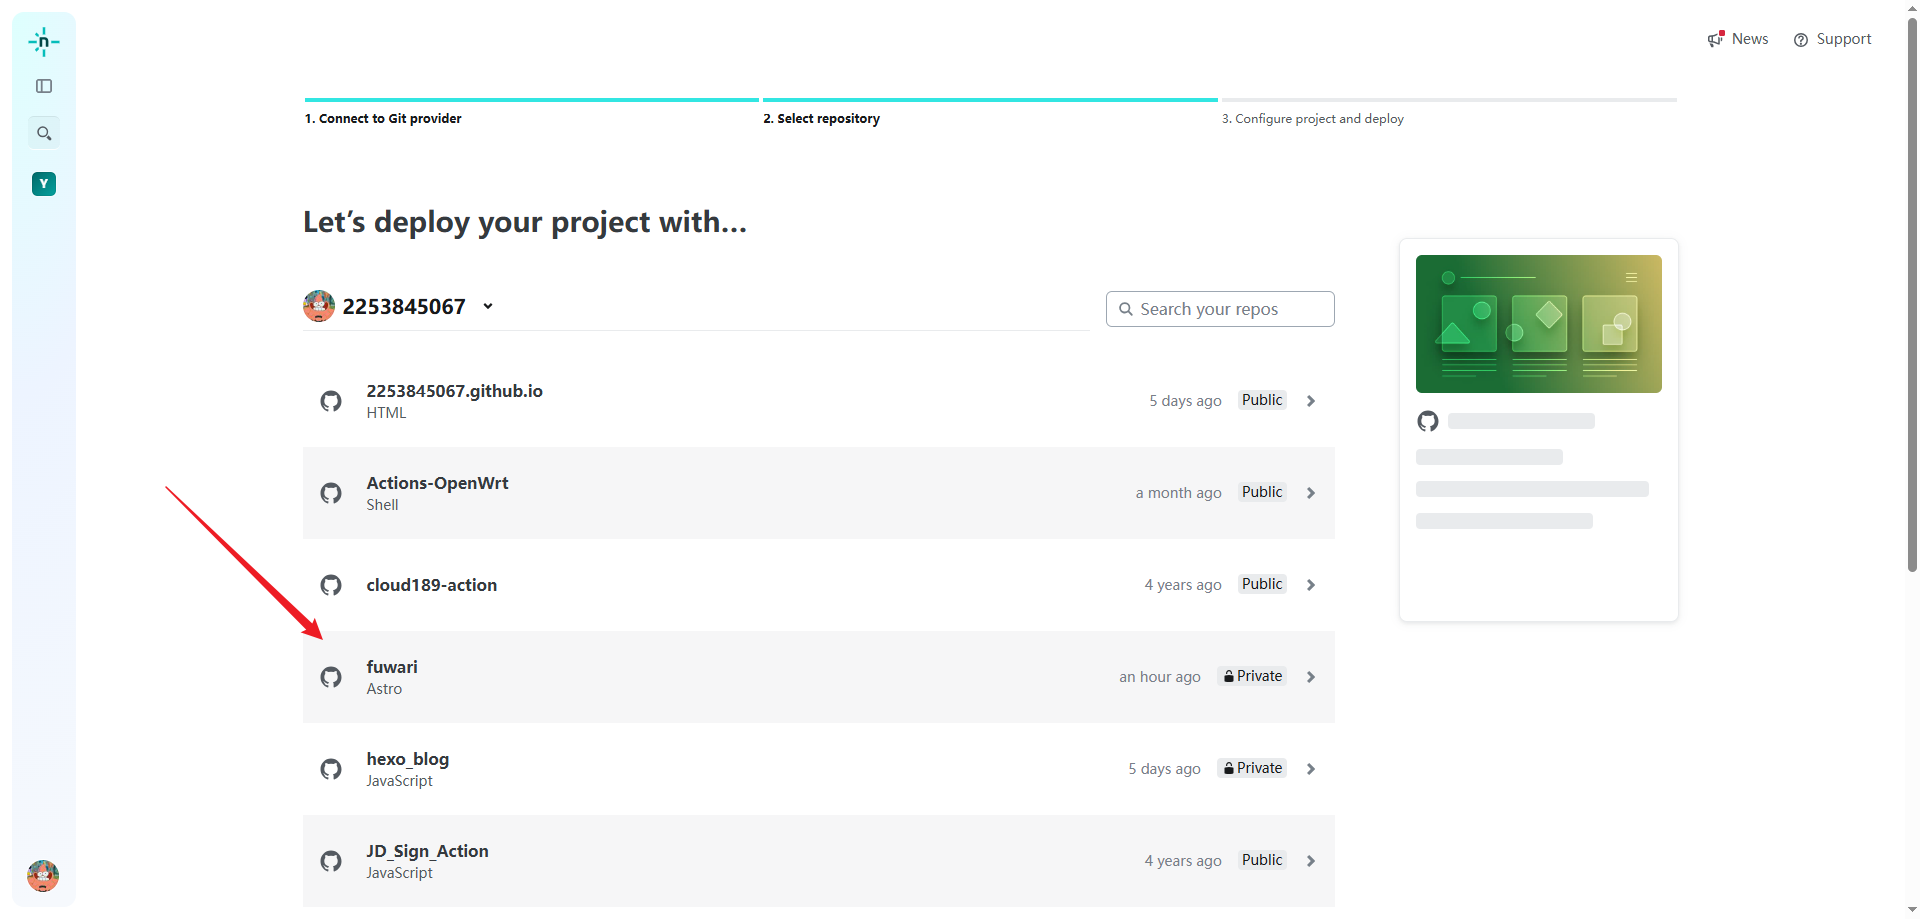
选择你的博客
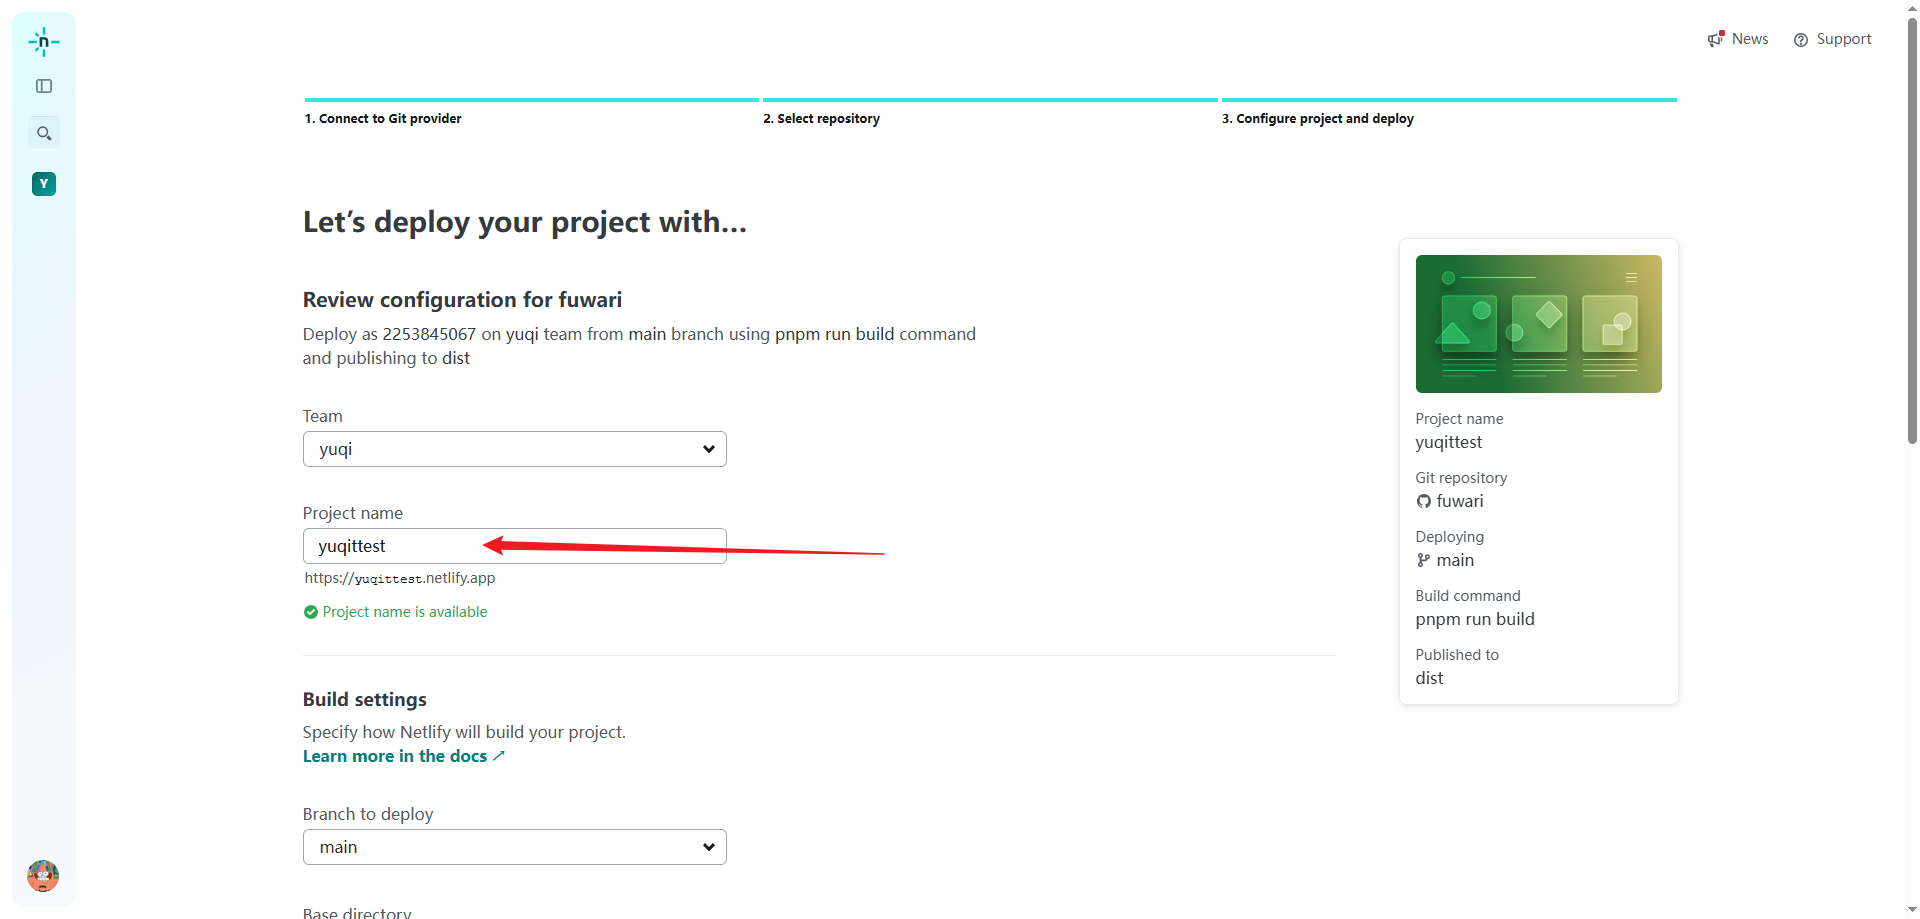
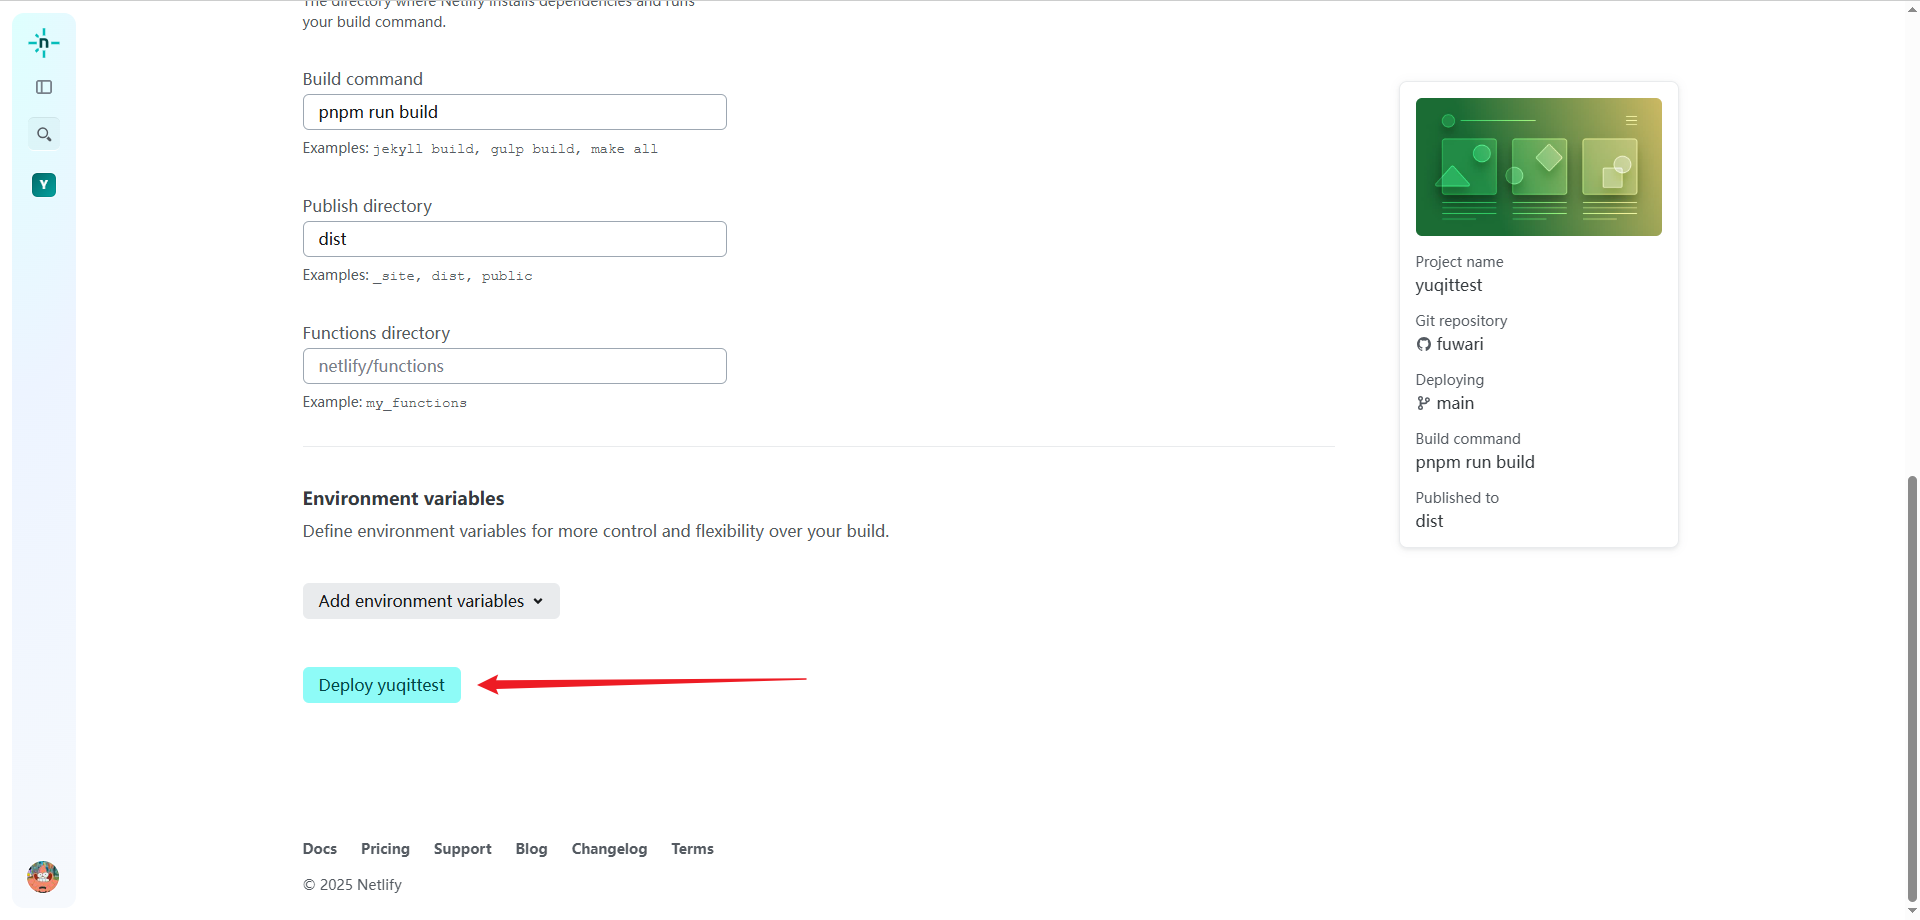
输入你的项目名称后点击部署
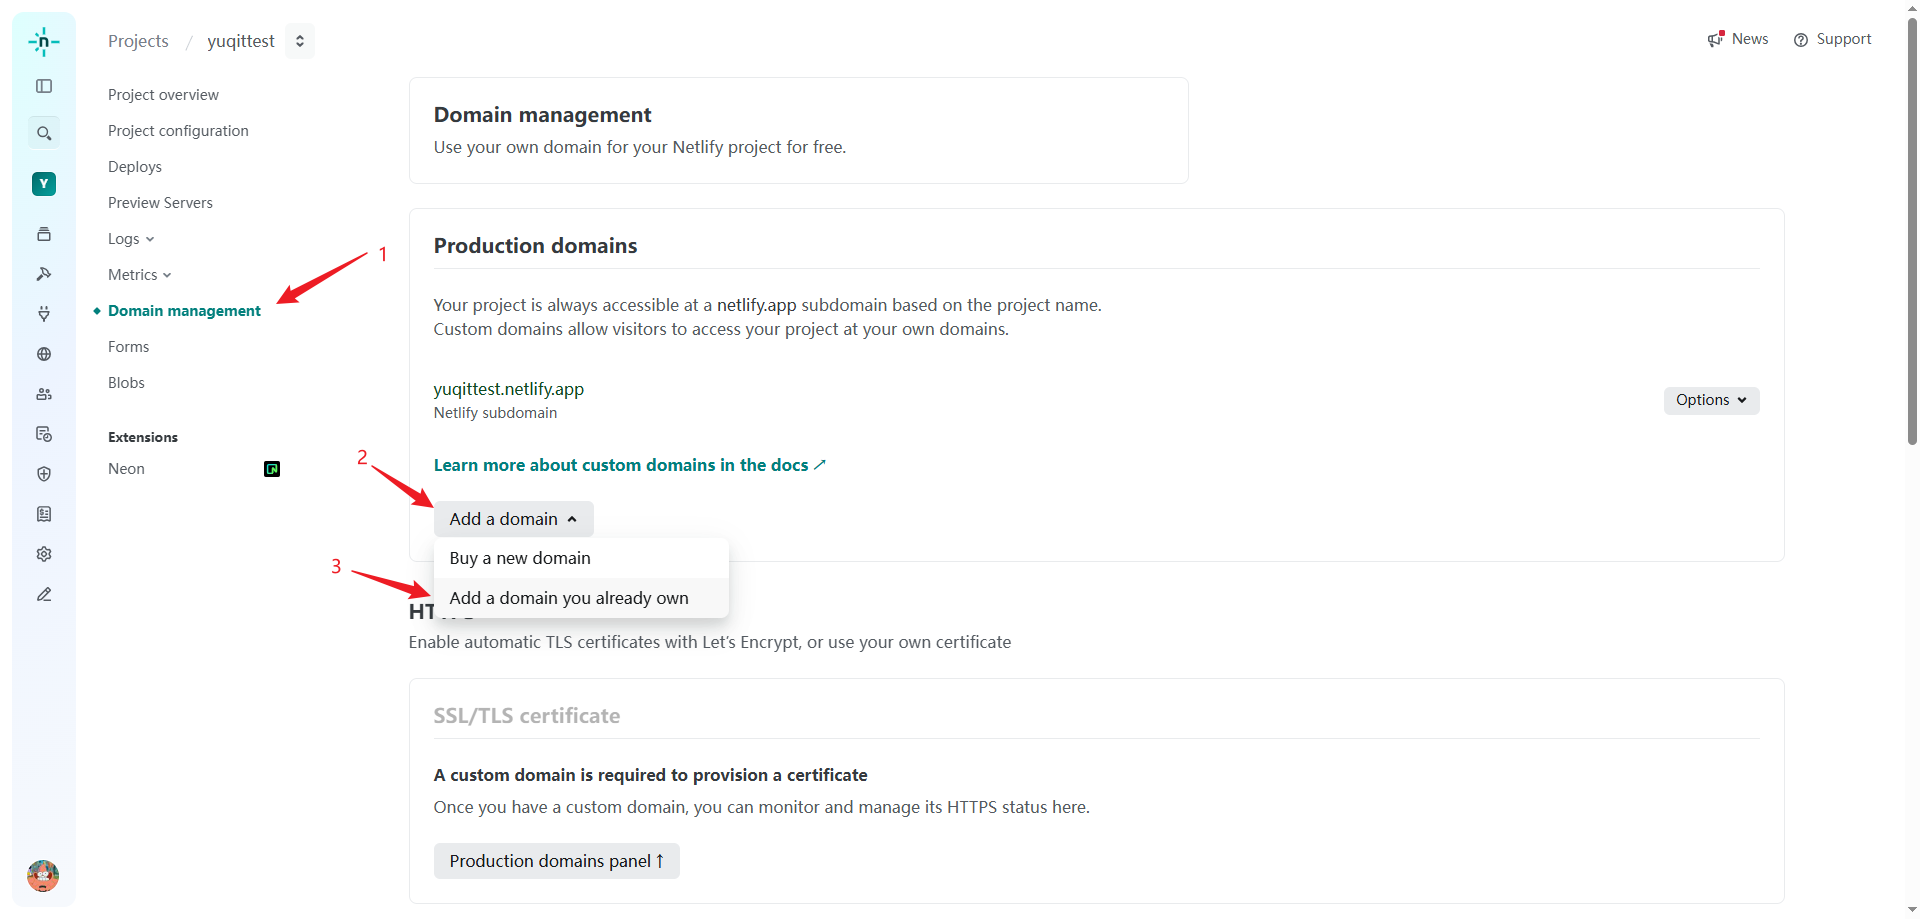
点击域名管理->添加域->添加已拥有的域名
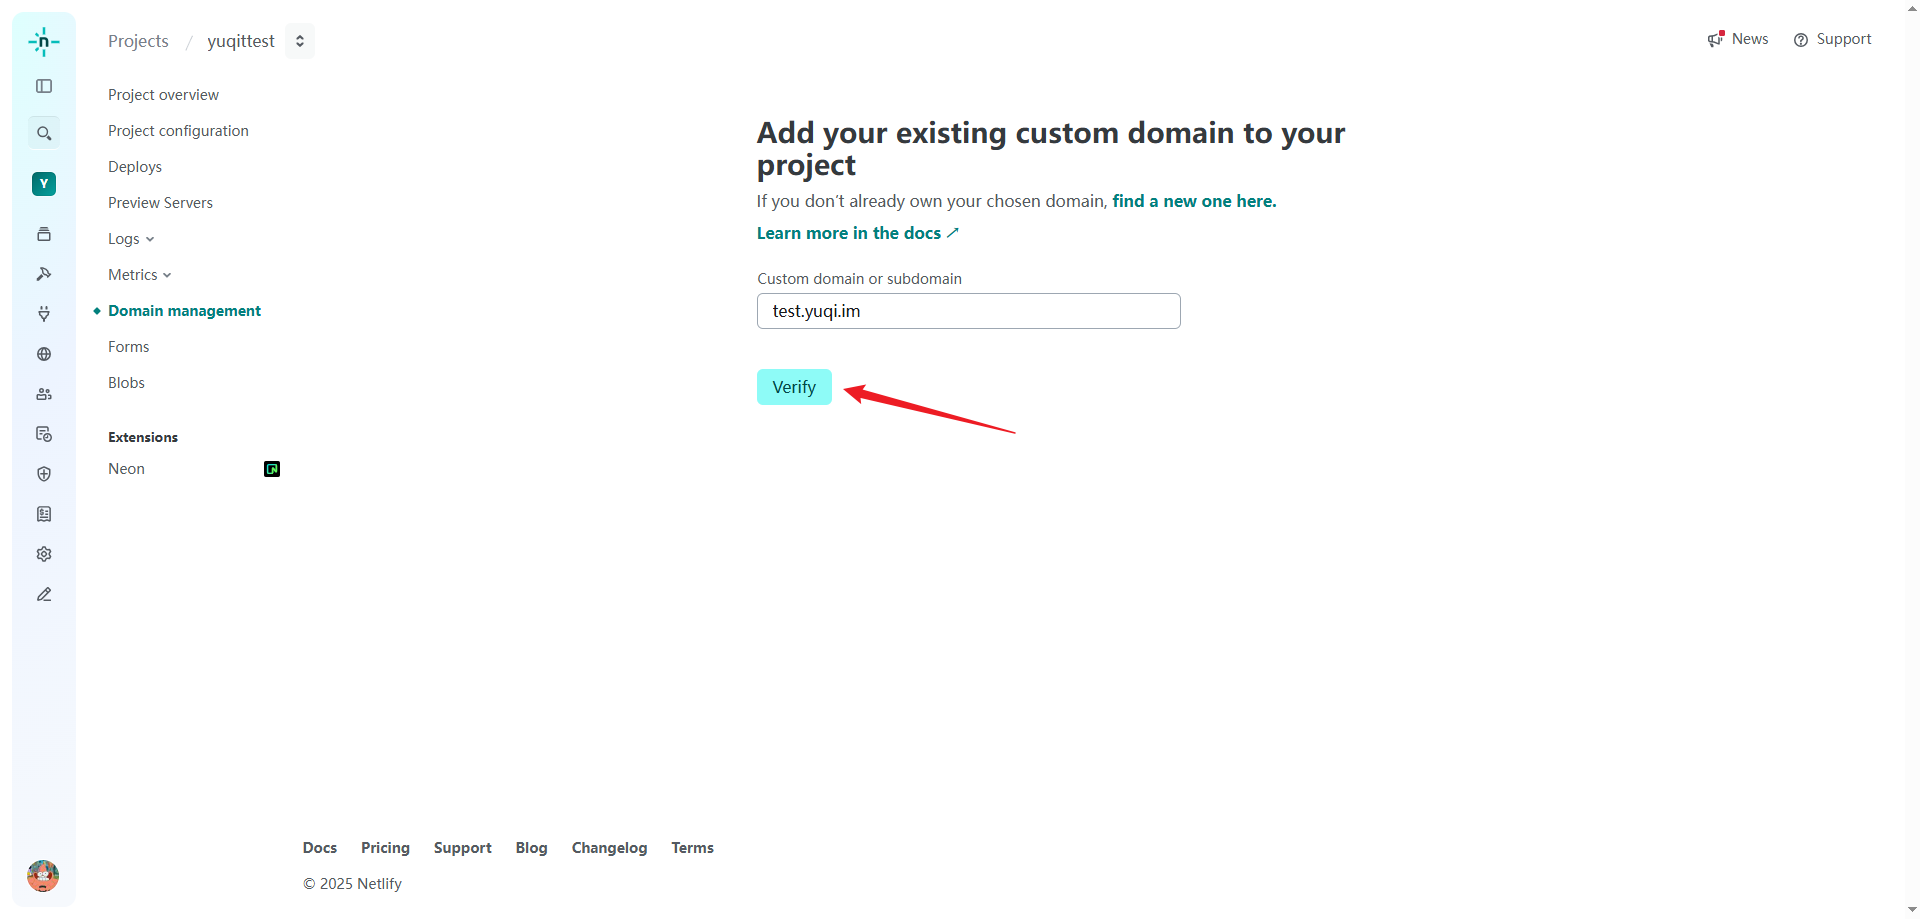
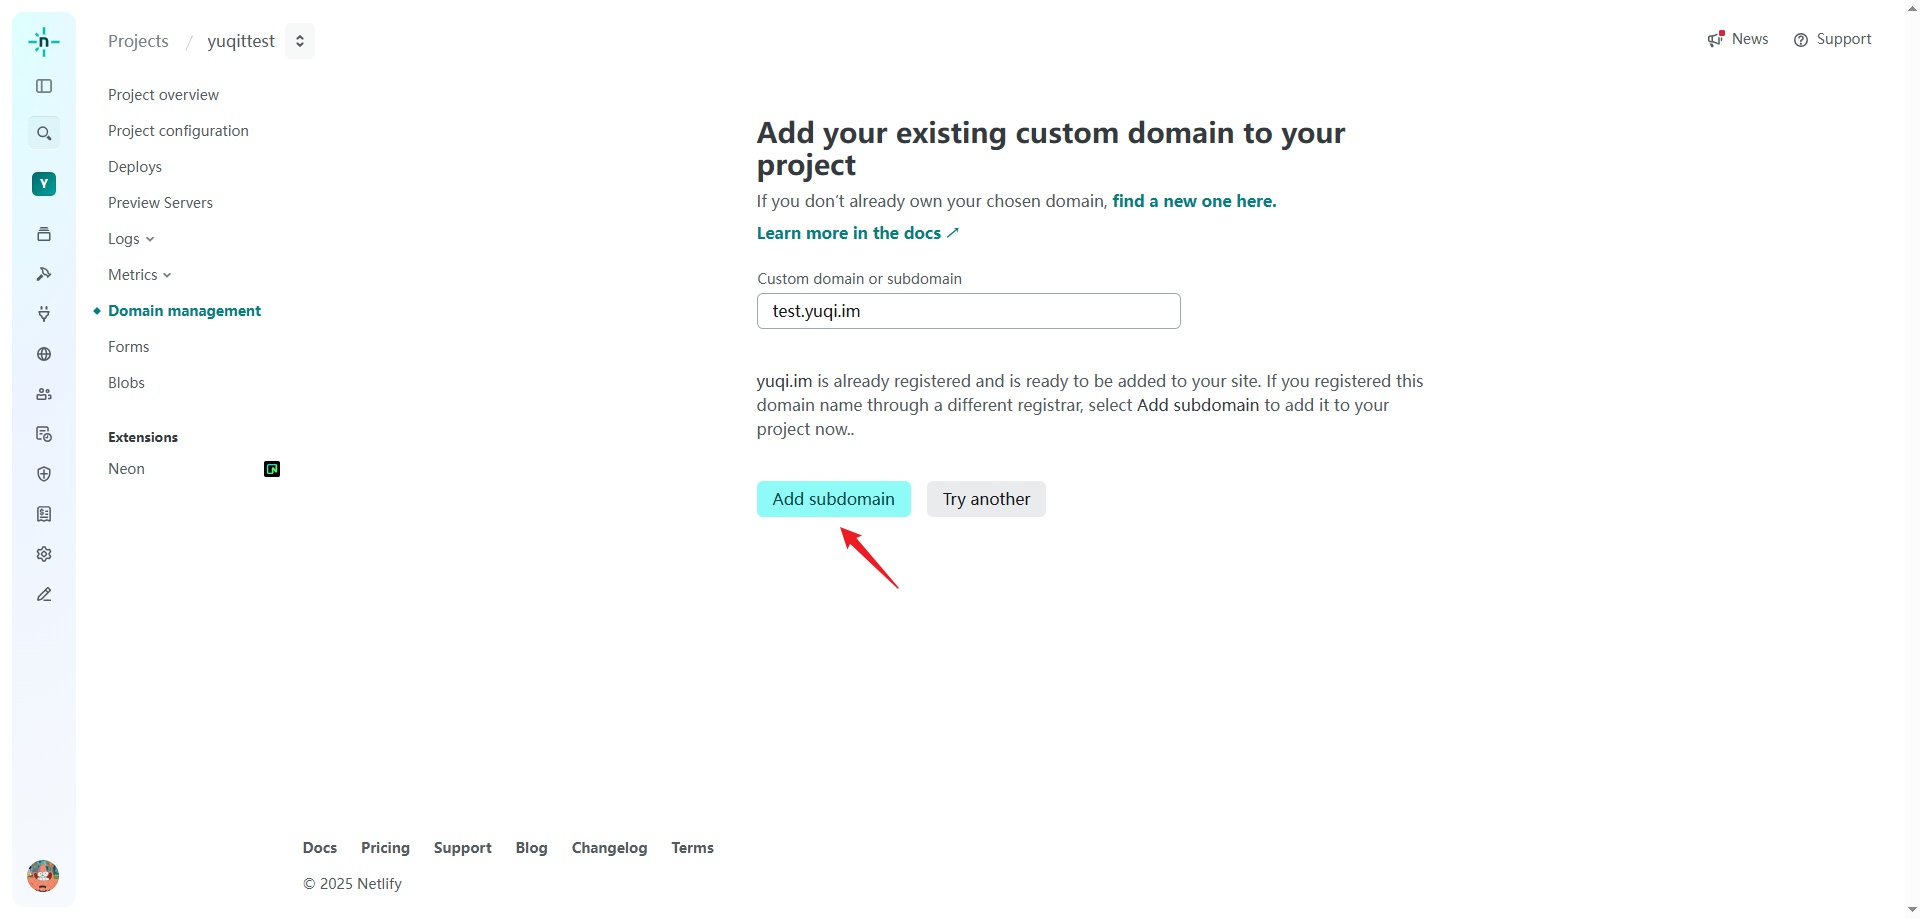
输入域名后点击核实->添加子域名
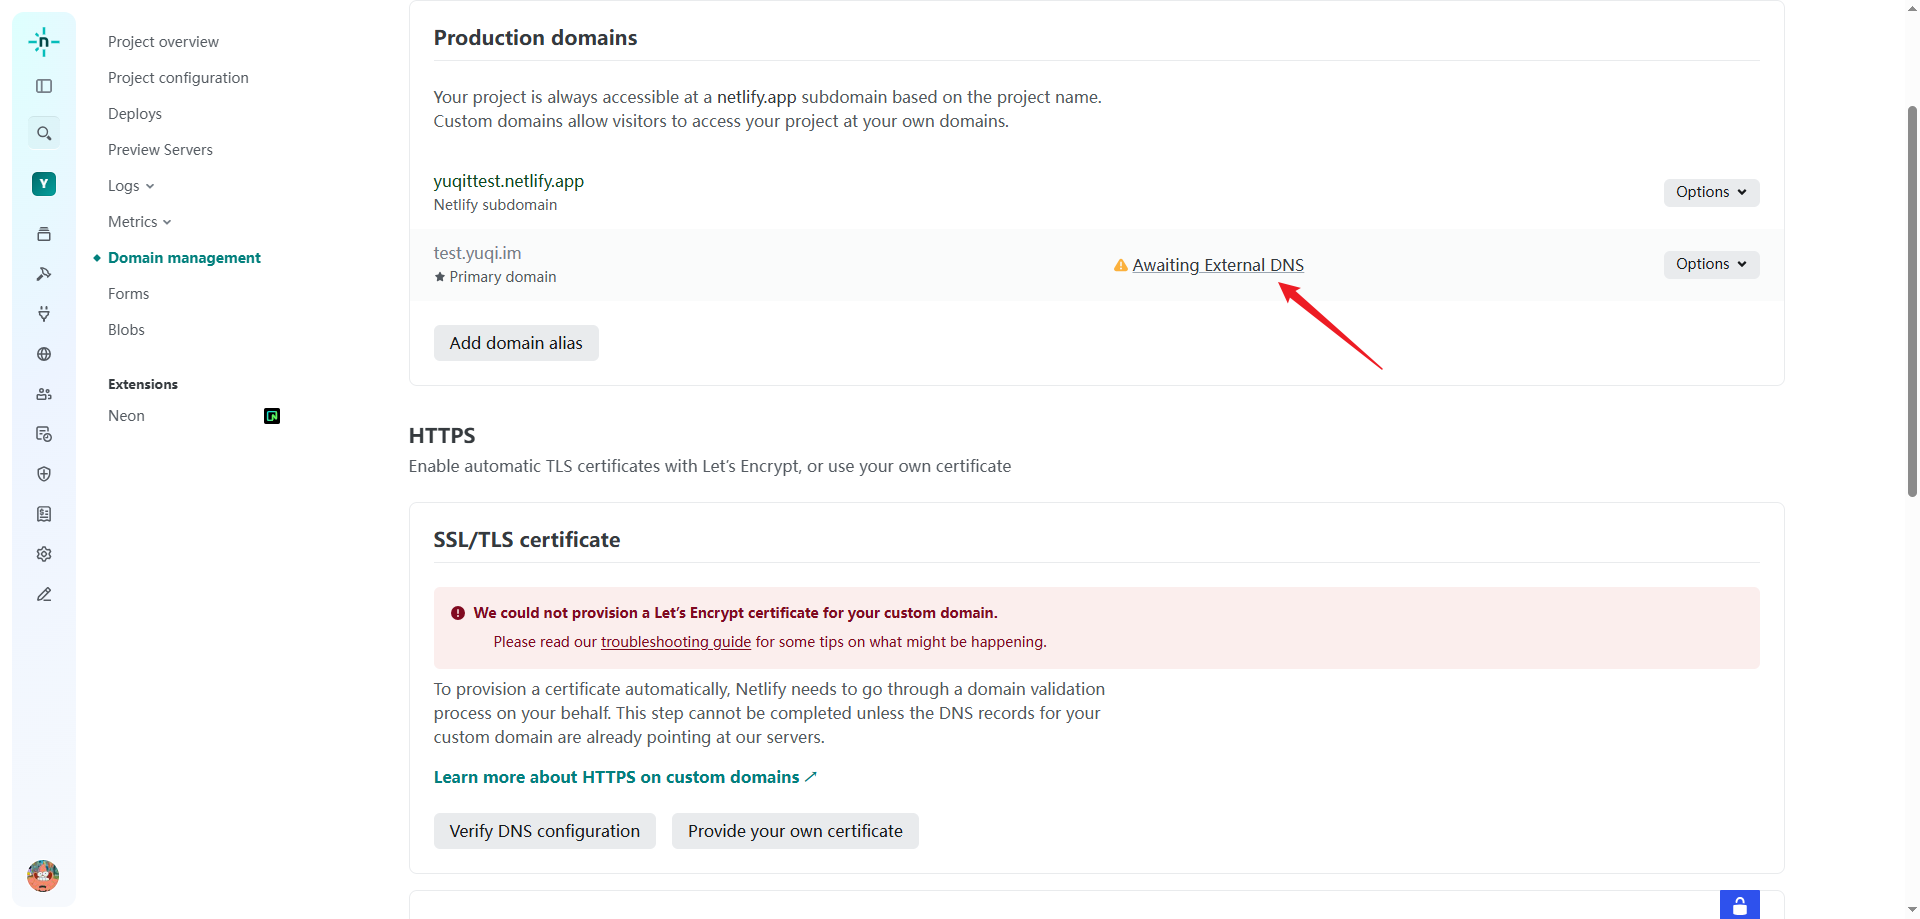
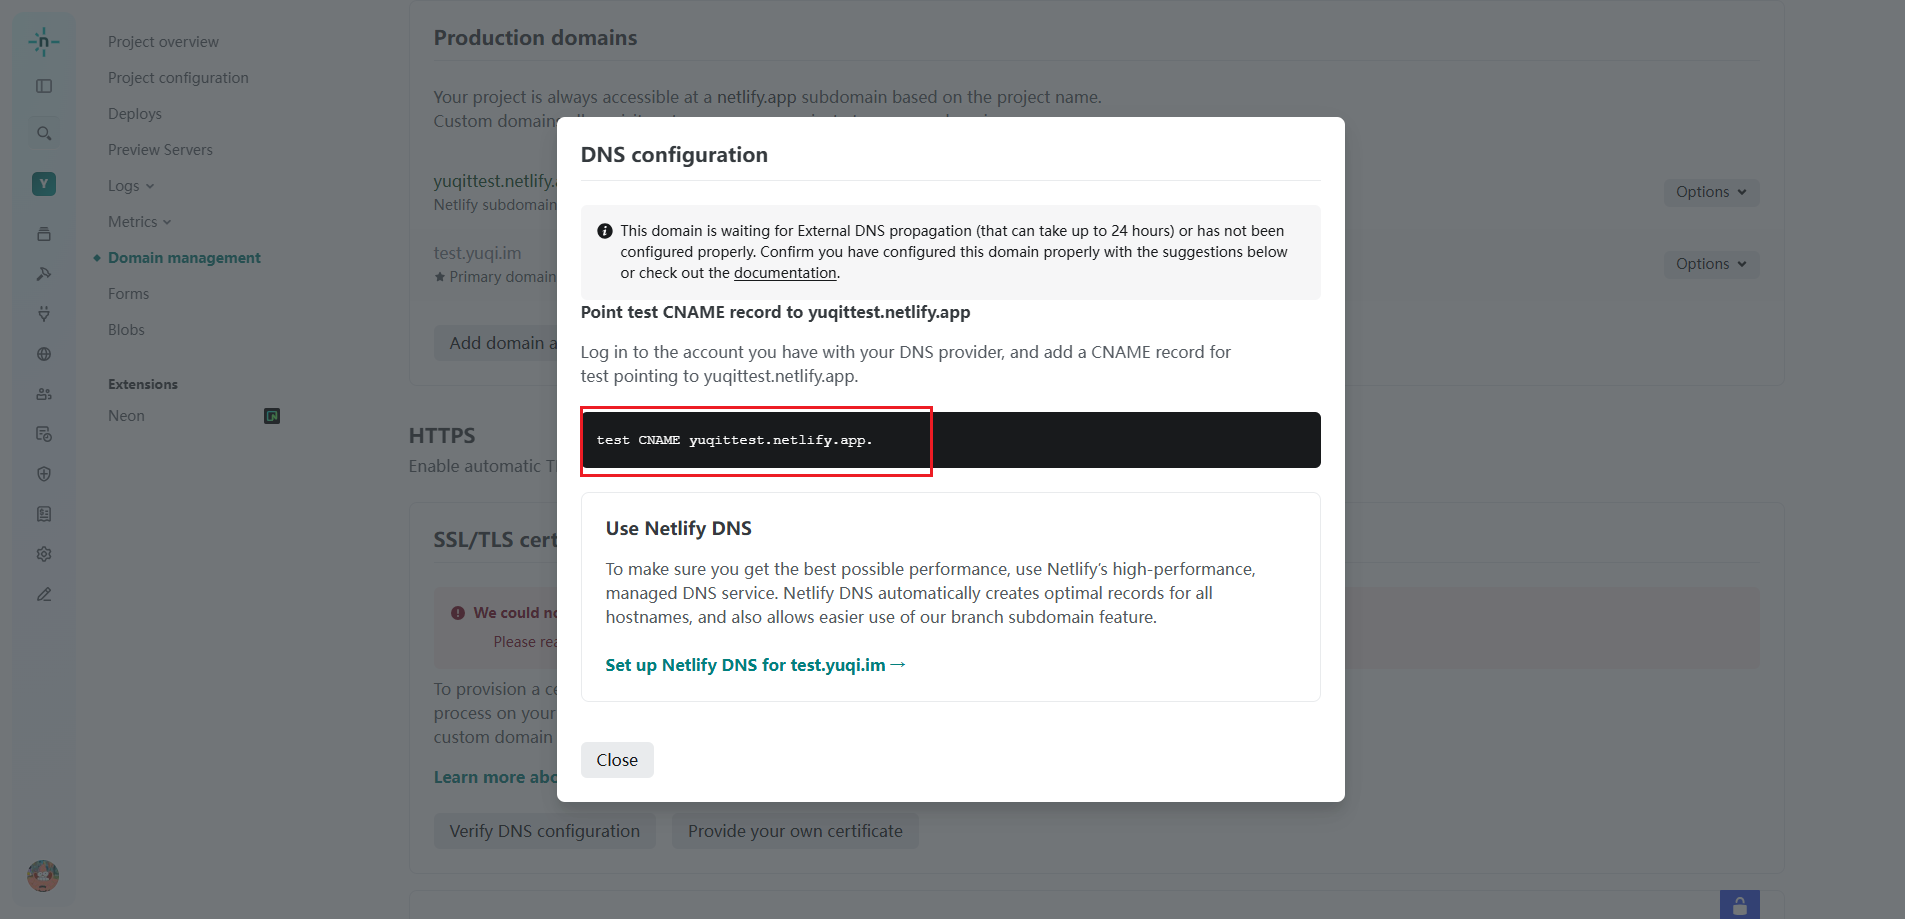
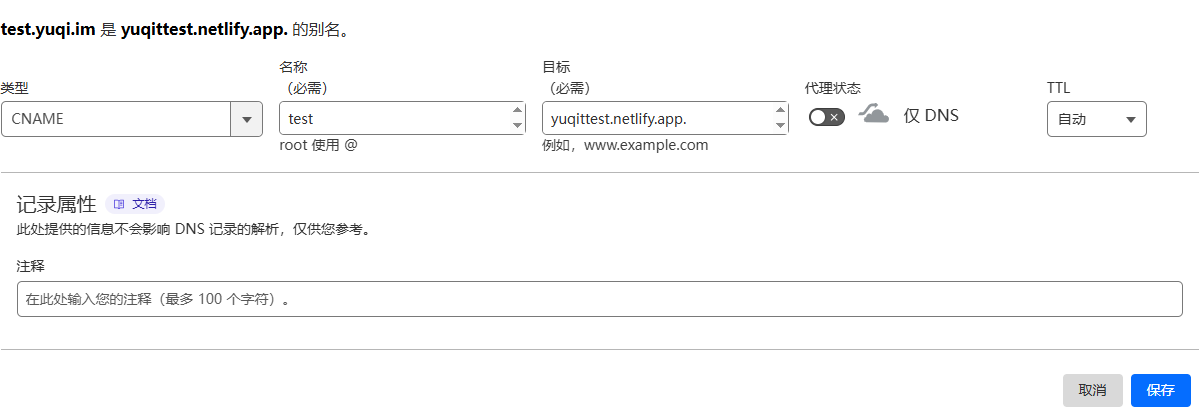
等待添加DNS解析记录,我们去域名管理的地方把DNS解析添加上即可
等待SSL/TLS证书申请下来后,直接访问设置好的域名就可以进入博客了
最后 你只需要在本地编写文章,然后使用Git将更改推送到远程仓库,Netlify就会自动部署,更新你的博客!